


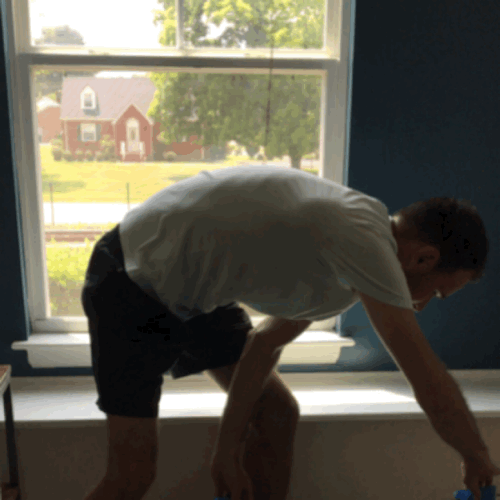
There’s nothing that ruins a vacation more than your children waking well before 6AM. Trust me, I’ve been on that vacation!! 9/10 times the reason your child wakes early while away from home is because of the environment. New bed and new smells for one, but the bright sun shining in through the windows is generally the #1 reason for those early morning vacation wake up calls!!
For less than $15 you can completely black out your child’s room on vacation!! Ready to make it happen? Here’s the Campbell-Approved way to use aluminum foil and painters tape for a cheap window covering!
Materials Needed:
-
Aluminum Foil (no brand preference here!)
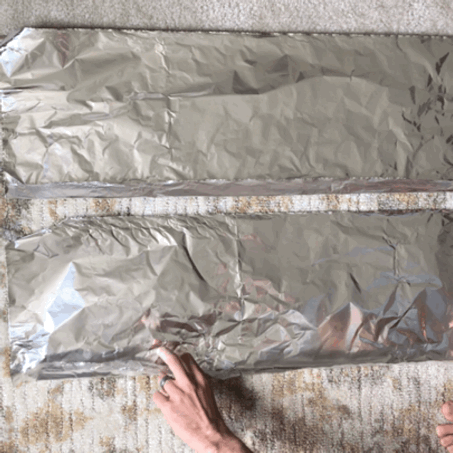
Step 1: Measure the width of the window using the foil roll. This is the standard width for each row of foil you’ll use
Step 2: Once you’ve measured the width, tear the foil strip off and lay on the floor
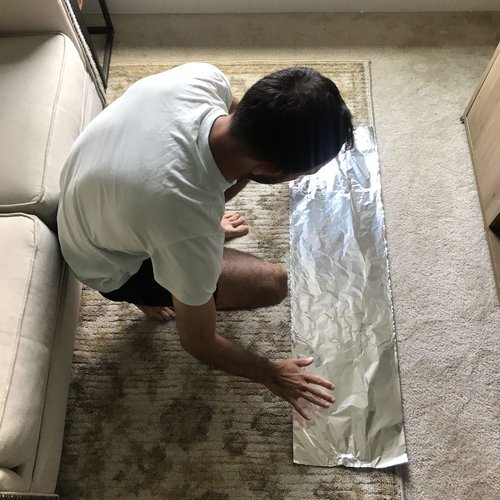
Step 3: Fold up a 1 inch lip on the bottom of this foil piece.
Step 4: Using the first strip as a measuring gauge, roll out the next layer of foil!
Step 5: Fold up a 1 inch lip on the bottom of this foil piece

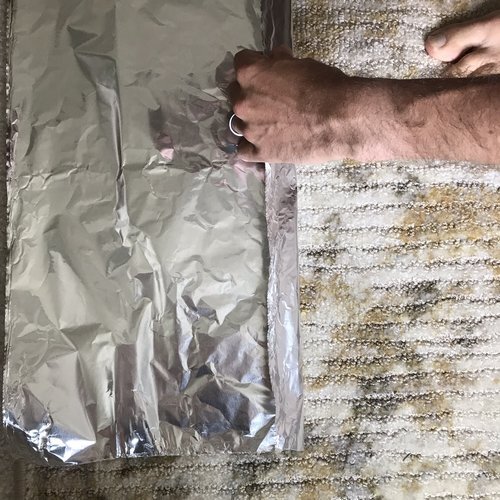
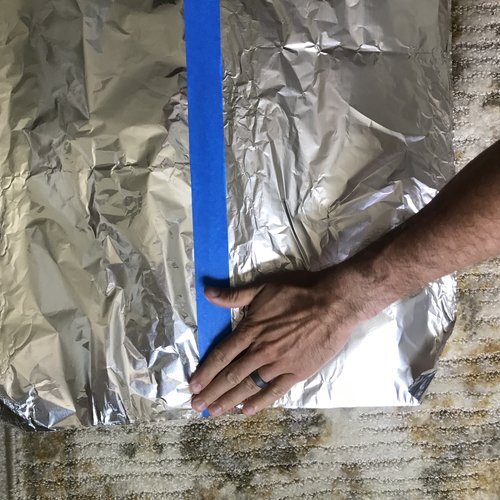
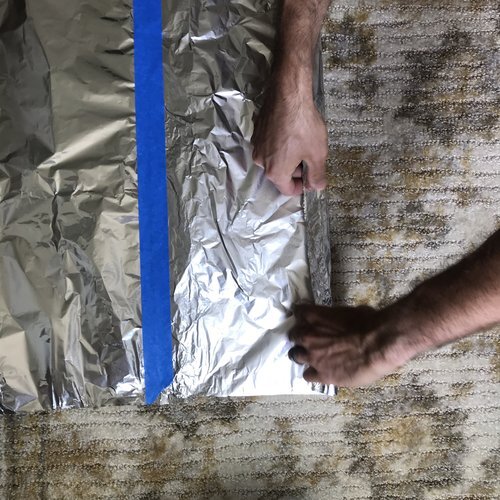
Step 6: Now it’s time to latch these 2 together! Hold the bottom of the second strip, lift up and flip over to pinch the 2 lips together. This will help seal any light that could come between the different layers!
Step 7: Tape the 2 layers together, over the lip you’ve just sealed together!
Step 8: Fold up a 1 inch lip on the bottom of the foil piece (there is now tape on the top)
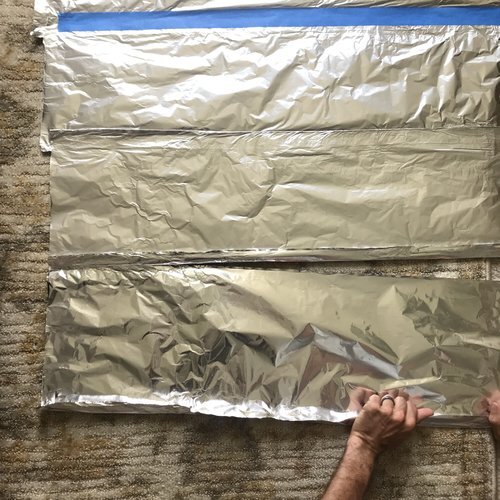
Step 9: Using the last strip as a measuring gauge, roll out the next layer of foil
Step 10: Fold up a 1 inch lip on the bottom of the foil piece you just cut
Step 11: Now it’s time to latch these 2 together! Hold the bottom of the second strip, lift up and flip over to pinch the 2 lips together. This will help seal any light that could come between the different layers! (See video under Step 6 for visual again…)
Step 12: Tape the 2 layers together, over the lip you’ve just sealed together!
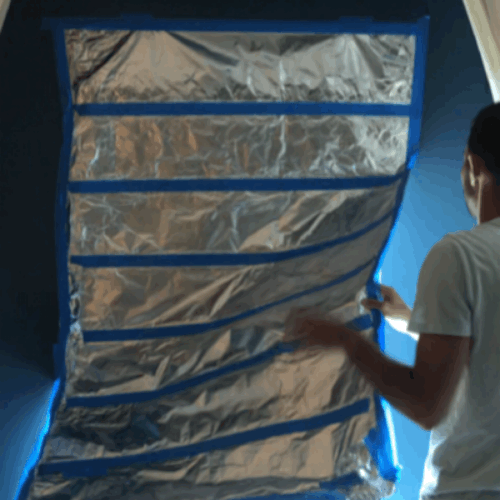
Step 13: Repeat these steps as many layers as you need to fully cover the window or door covering.
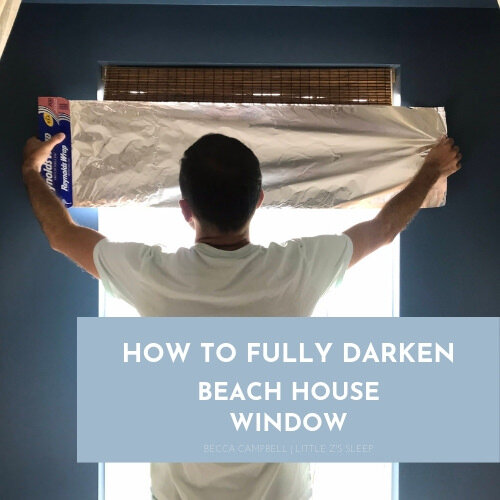
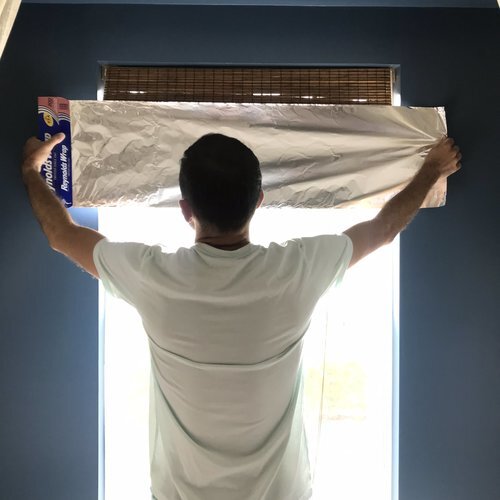
Step 14: Once all layers are on and taped, it’s time to pick up and place over the window!
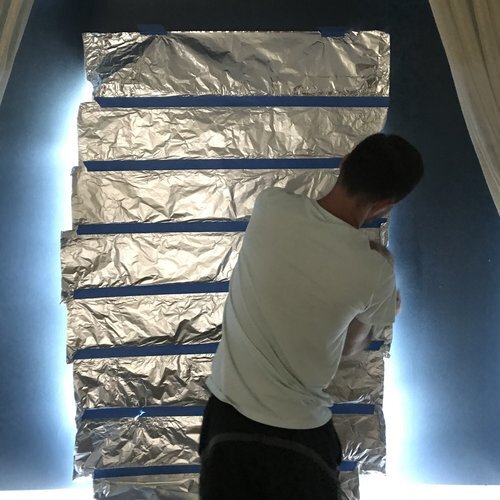
Step 15: Tape top and sides to the wall using the painters tape. If necessary, use other small pieces of foil to cover any corners.
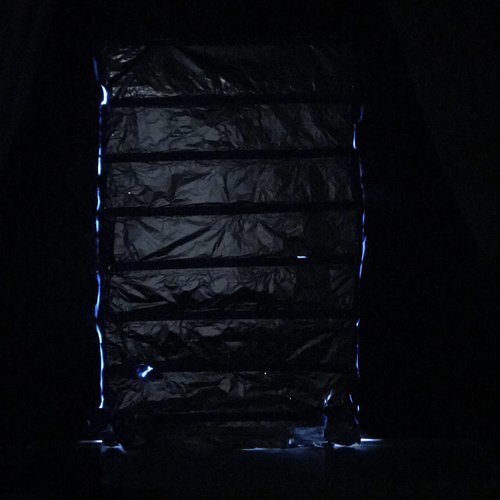
Step 16: Turn off the lights and admire the darkness!!!!
Even better than the set-up is the clean-up!!! Easy as….
Of course, this is just one way to cover the windows using foil and take! Now it’s your turn!! Submit your foil WINS and FAILS to us!!! We’d love to see how you do this, and share your story!! Email: GoodMorning@littlezsleep.com
–Have a baby? Darkness is great, but before you head off- work through these 4 Steps To Solve Nightwakings so we can have even better Zzz’s while away!!
–Have a toddler? By the way- now that you’ve got the room pitch black dark, you can easily set up that Toddler Clock!! We bring ours on vacation every time! Read this blog on how to set-up the Toddler Clock!
Happy Vacation Dreams!!
Becca Campbell

Leave a Reply


$10 OFF
We're here to help you get started!
Use code "SLEEPTONIGHT"
in the next 24 hours
to save $10 on any Sleep Program!


[…] Next, get to your destination and make their room as dark as possible!!!! Follow THIS foil tutorial we use every time we travel with the […]